Account Setup
Let's get your Relae account configured and ready to receive webhooks.
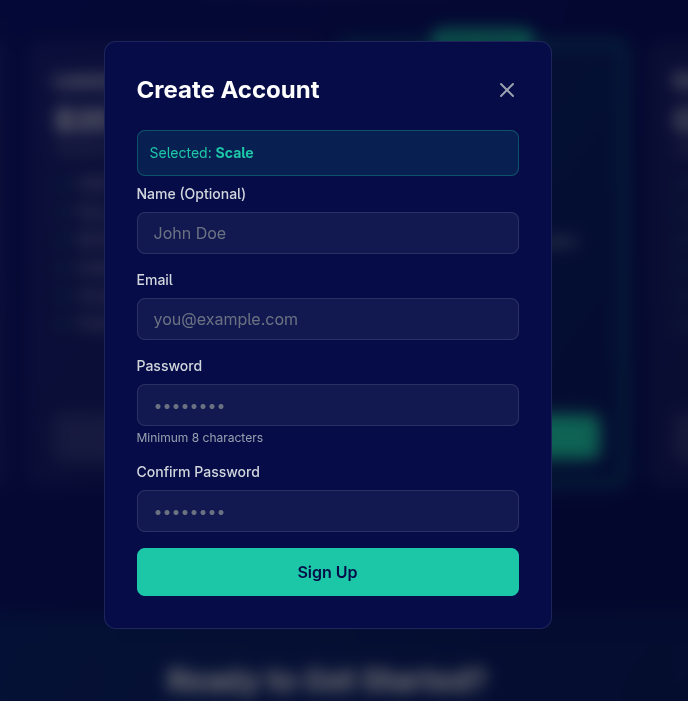
Step 1: Create Your Account
-
Go to relaehook.com
-
Click "Get Started" or "Sign Up"
-
Choose your pricing tier:
- Builder (Free): 10,000 events/month, 7-day retention
- Launch ($35/mo): 100,000 events/month, 14-day retention
- Scale ($65/mo): 500,000 events/month, 30-day retention + analytics
- Enterprise: Custom pricing and features
-
Fill in your account details:
- Name (optional)
- Email address
- Password (minimum 8 characters)
We recommend starting with the Builder (Free) tier to test Relae. You can upgrade anytime as your needs grow.
Step 2: Verify Your Email
After signing up (free tier only), you'll receive a verification email:
- Check your inbox for an email from Relae
- Click the verification link
- You'll be redirected to your dashboard
If you selected a paid tier, you'll be redirected to Stripe checkout first, then receive your verification email.
Step 3: Access Your Dashboard
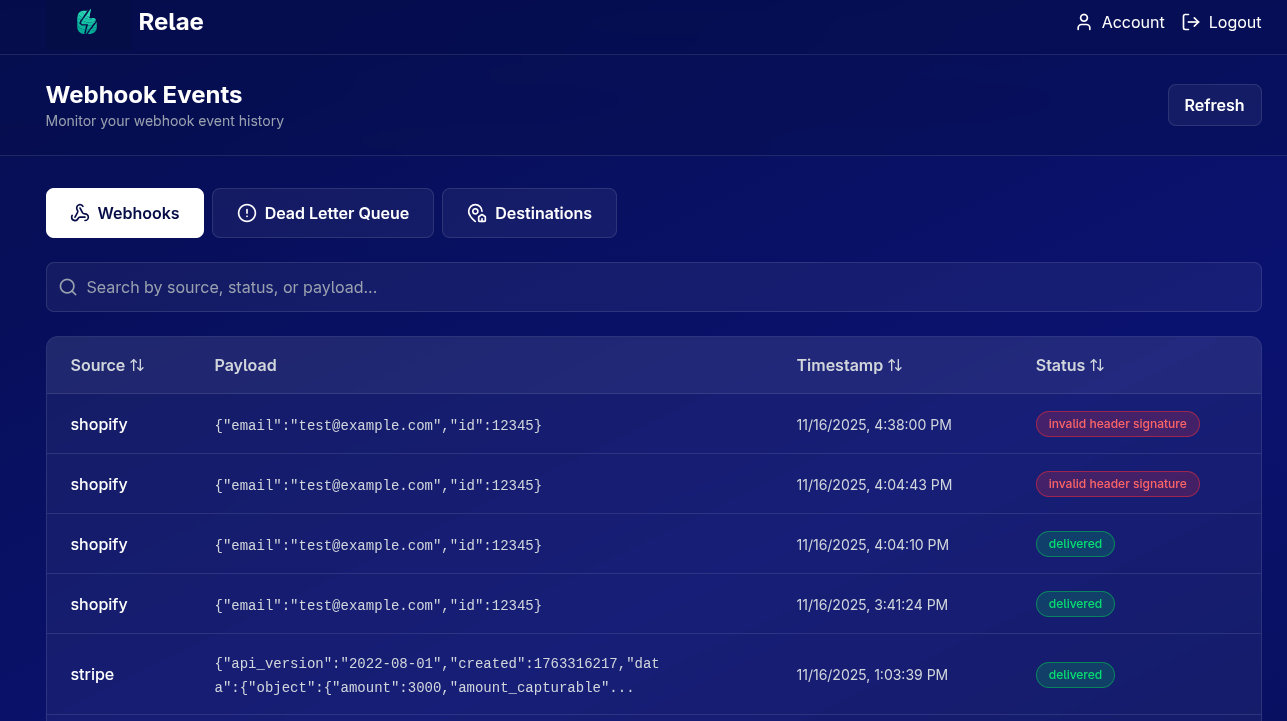
Once verified, you'll land on your dashboard with four main tabs:
- Webhooks: View all successfully delivered webhook events
- Dead Letter Queue (DLQ): Manage failed webhook events
- Destinations: Configure where webhooks should be forwarded
- Analytics: View performance metrics (Scale tier and above)
Step 4: Create Your First Destination
Now let's set up where your webhooks should be forwarded to.
4.1 Navigate to Destinations
Click the "Destinations" tab in your dashboard.
4.2 Add a New Destination
Required Fields
| Field | Description | Example |
|---|---|---|
| Source | The vendor sending webhooks | stripe, shopify, github |
| Destination URL | Your application's webhook endpoint | https://api.yourdomain.com/webhooks/stripe |
Optional Fields
| Field | Description | Example |
|---|---|---|
| Vendor Webhook Secret | The signing secret from your vendor | whsec_abc123... |
| Custom Headers | Additional headers to include | Authorization: Bearer xyz |
This is optional but highly recommended for security. Relae will use this to verify that incoming webhooks are authentic and come from your vendor, not a malicious actor.
4.3 Example Configuration
Here's an example setup for Stripe:
Source: stripe
Destination URL: https://api.yourdomain.com/webhooks/stripe
Vendor Webhook Secret: whsec_1234567890abcdef (from Stripe Dashboard)
Custom Headers:
  - Authorization: Bearer your_api_token_here
  - X-Custom-Header: any-value
4.4 Save Your Destination
Click "Save Destinations" and you'll see:
- A success message
- Your new destination card with a unique Webhook Endpoint URL

Step 5: Copy Your Relae Endpoint URL
Each destination gets a unique webhook endpoint URL from Relae that looks like:
https://api.relaehook.com/webhook/{unique-id}
Click the "Copy" button to copy this URL. You'll use it in the next step.
- Each destination has its own unique endpoint URL
- This URL is specific to one vendor/source
- Keep it secure - anyone with this URL can send webhooks to your app
- You can rotate the URL anytime if it's compromised
In the next section, we'll show you how to:
- Configure your vendor to send webhooks to this URL
- Verify the HMAC signature on forwarded webhooks
- Test the entire flow
Understanding Your Dashboard
Let's quickly understand what each section does:
Webhooks Tab
View all successfully delivered webhook events with:
- Source (vendor name)
- Payload preview
- Timestamp
- Status
Dead Letter Queue (DLQ)
Events that failed after 5 retry attempts, showing:
- Failed reason
- Original payload
- Retry button
Destinations Tab
Manage your webhook destinations:
- Add new destinations
- Edit existing destinations
- Rotate endpoint URLs
- View last used timestamp
Analytics Tab (Scale & Enterprise only)
Performance metrics including:
- Total events processed
- Success/failure rates
- Average response times
- Event volume charts
Security Best Practices
Before moving to the next step, keep these security tips in mind:
- ✅ Always provide the Vendor Webhook Secret when possible
- ✅ Use HTTPS for your destination URLs (required)
- ✅ Add authentication headers if your endpoint requires them
- ✅ Verify Relae's HMAC signature on forwarded webhooks
- ✅ Rotate endpoint URLs if you suspect compromise
Next Steps
Great! Your account is set up and your first destination is configured. Now let's configure your vendor to send webhooks to Relae:
Troubleshooting
I didn't receive the verification email
- Check your spam folder
- Wait 5 minutes (emails can be delayed)
- Click "Resend verification email" on the dashboard
- Contact support at support@relaehook.com
I can't find the Vendor Webhook Secret
Each vendor stores this in a different place:
- Stripe: Dashboard → Developers → Webhooks → Signing secret
- Shopify: Settings → Notifications → Webhooks → Webhook signing secret
- GitHub: Repository Settings → Webhooks → Secret
Can I have multiple destinations?
Yes! You can create as many destinations as you need. For example:
- One for Stripe webhooks
- One for Shopify webhooks
- One for GitHub webhooks
Each gets its own unique endpoint URL and can have different settings.
What if I don't have a destination URL yet?
For testing, use:
- webhook.site - Get an instant test endpoint
- RequestBin - Another testing tool
- Ngrok - Tunnel to your localhost
These let you see incoming webhooks without building an endpoint first.